Creating and Saving a PDF from Google Slides or PowerPoint
Creating a Google Slides or PowerPoint presentation and saving it as a PDF is easier than you think. In fact, there are multiple ways to get the job done. We have detailed instructions, complete with screenshots, that will take you step by step through how to accomplish each one!
Saving a Slides Presentation as a PDF
There are a couple of different ways to create something with a Google Slides presentation and save it as a PDF.
Download
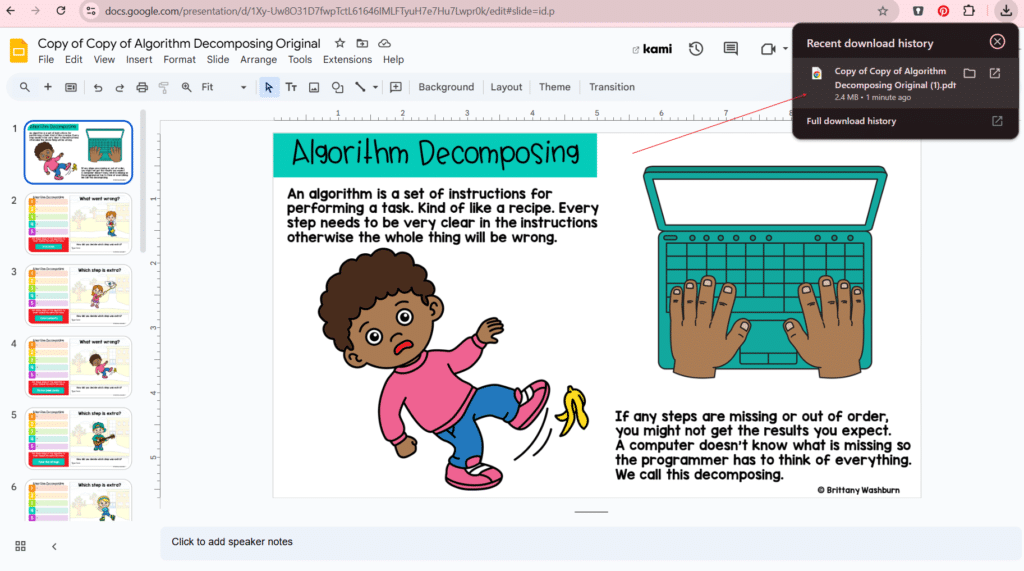
From the File menu, select the Download option and then choose PDF Document as the file type.
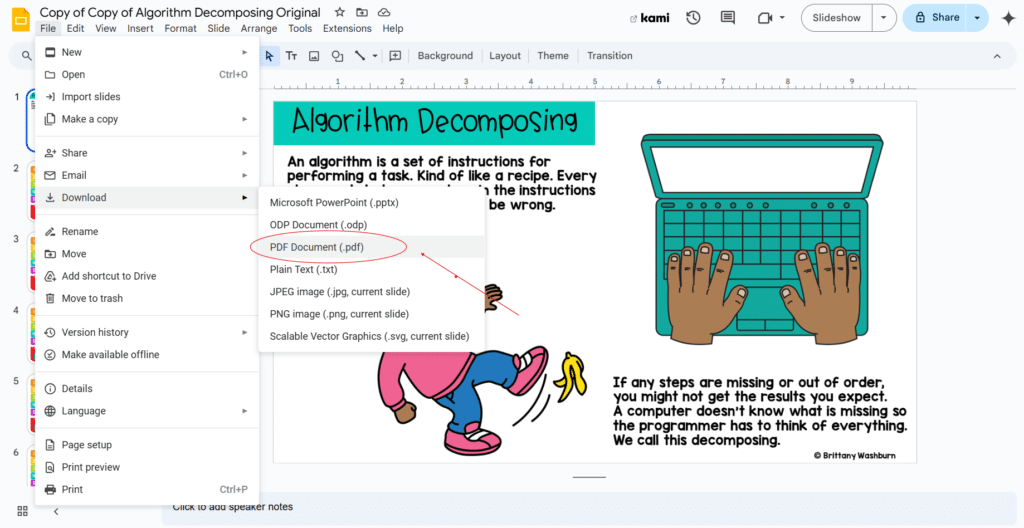
Go to your browser’s most recent downloads and open the file to review it!
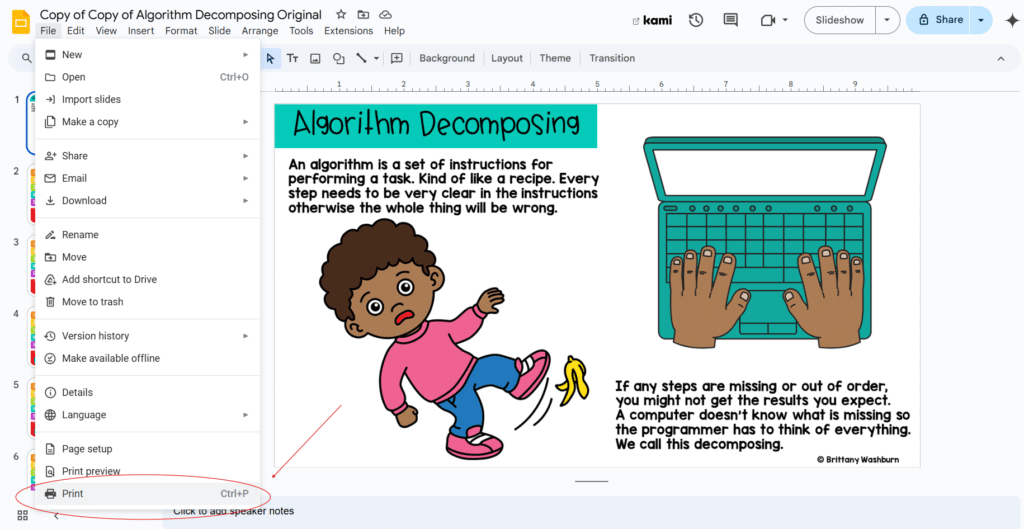
From the File menu, select the Print option. Alternatively, you can also use the shortcut Ctrl+P.
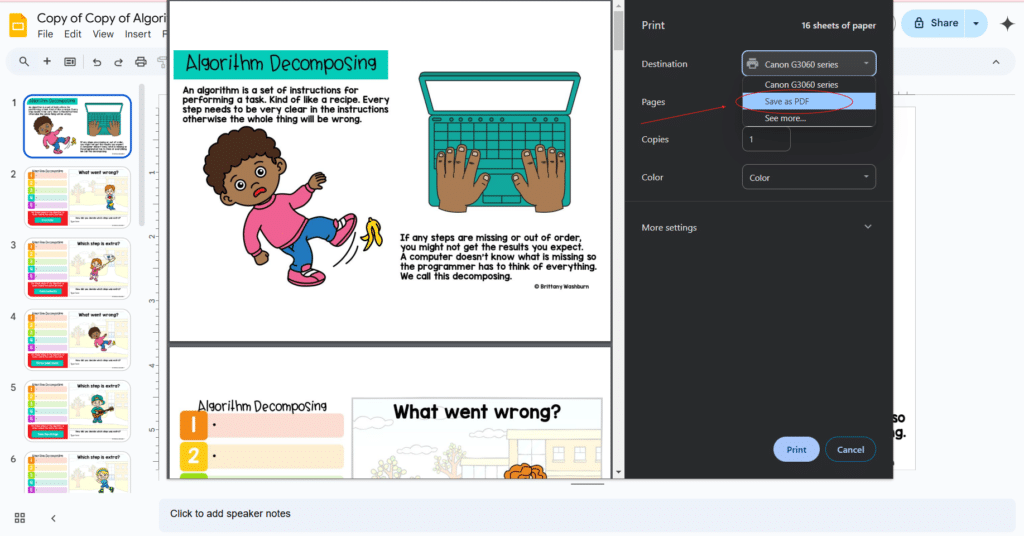
In the Print preview that opens, open the Destination menu. Underneath any printer options you have there, there will also be the option at the bottom to Save as PDF. Once, this is selected, instead of Print the word Save will appear in the bottom right. Click Save!
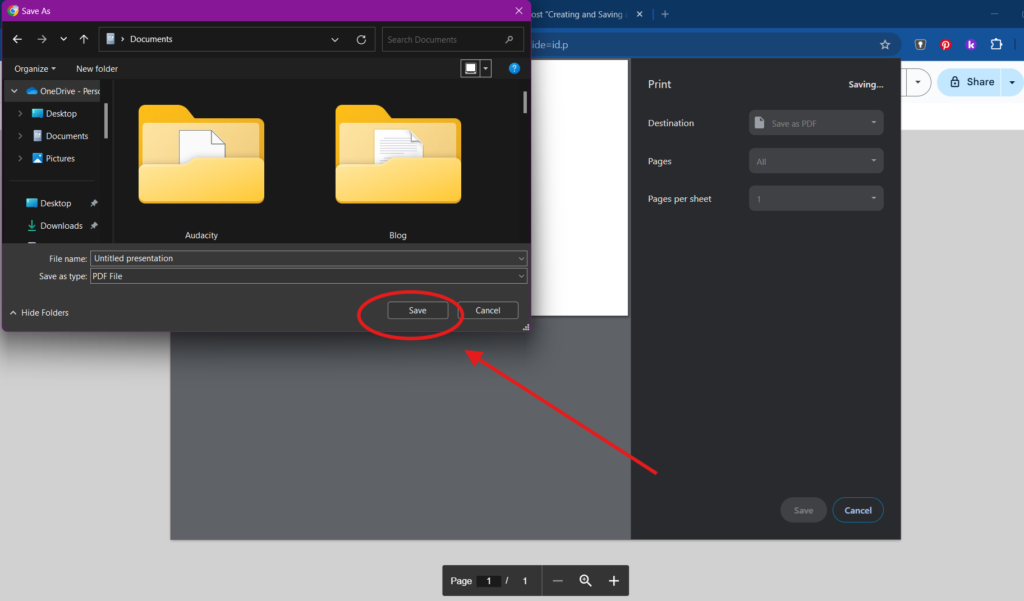
Now save the PDF in whatever location on your computer that you desire.
Saving a PowerPoint as a PDF
There are also several different ways to create something with a PowerPoint presentation and save it as a PDF. Things look a bit different depending on whether you are using the full Microsoft 365 software edition or the free in-browser option, but either way we’ll show you how it’s done.
Save As
PowerPoint Software
In the menu, select the Save As option and then choose Adobe PDF as the file type, or you may simply be able to choose Save as Adobe PDF. Now save the PDF in whatever location on your computer that you desire!
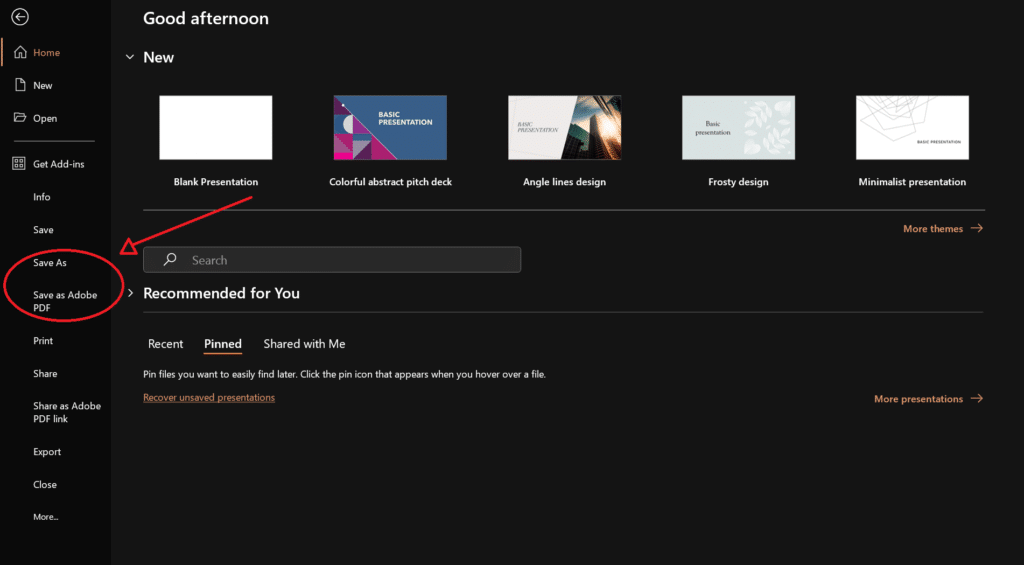
Download/Export
PowerPoint Software
From the menu, select the Export option and then choose Create Adobe PDF as the file type. Now click the square Create Adobe PDF button that appears to your right on the screen, and save the PDF in whatever location on your computer that you desire!
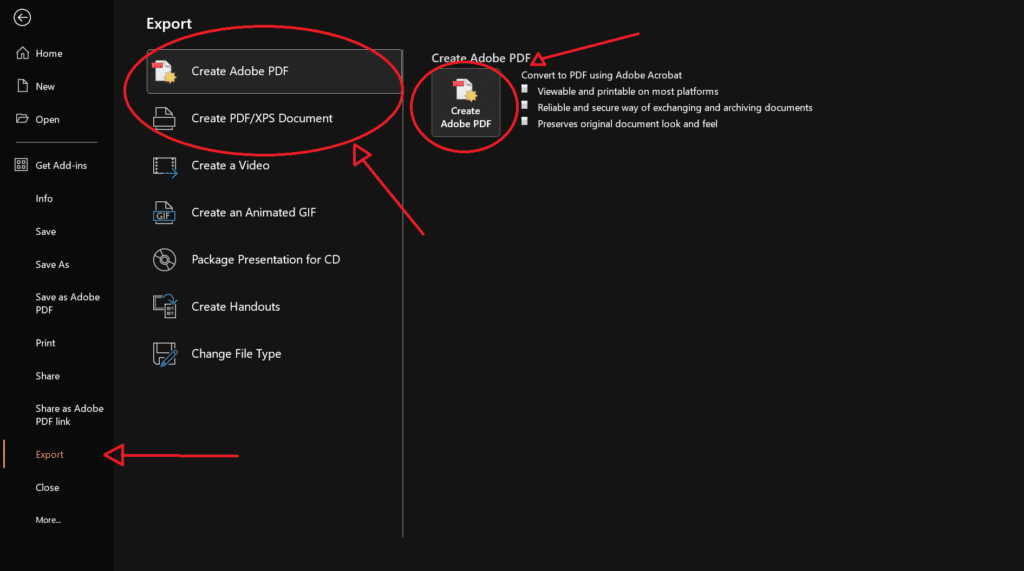
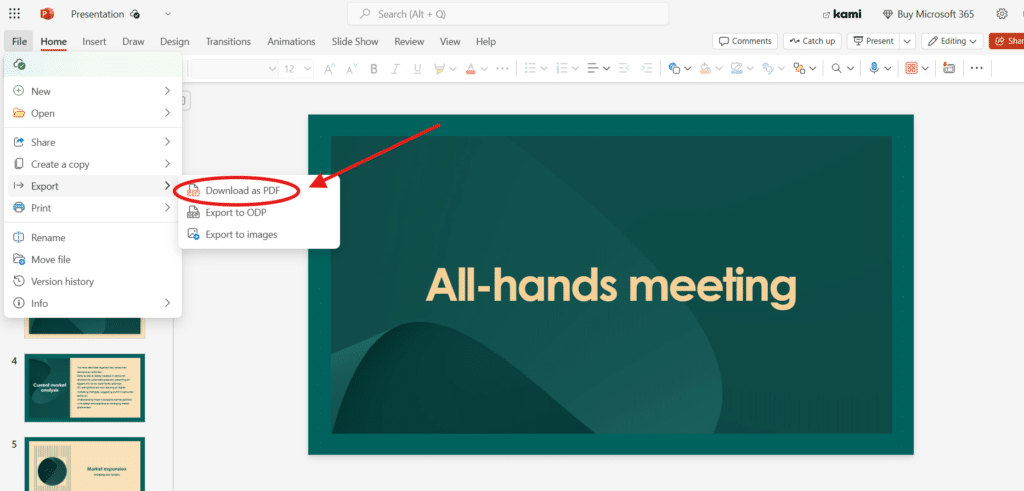
PowerPoint In-Browser
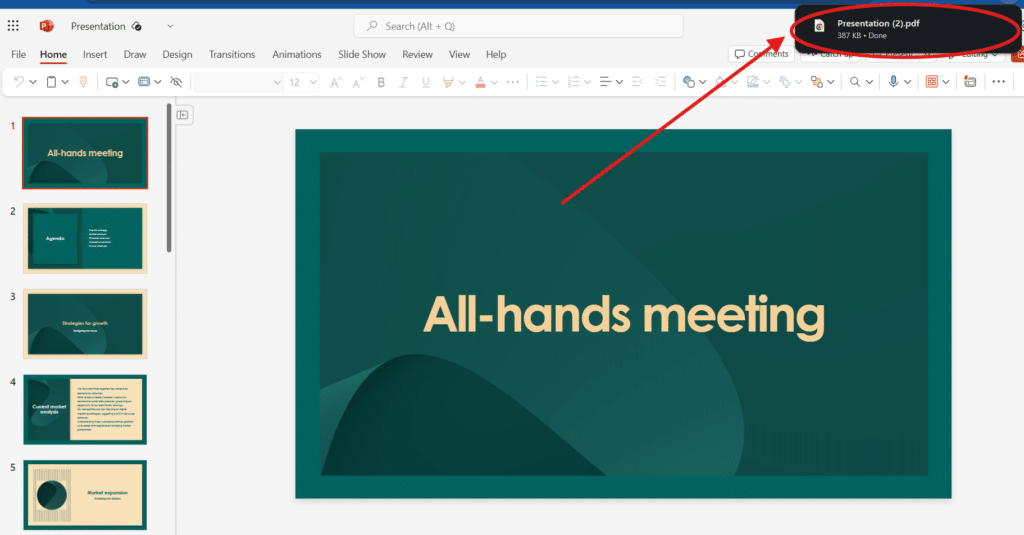
From the File menu, select the Export option and then choose Download as a PDF as the file type.
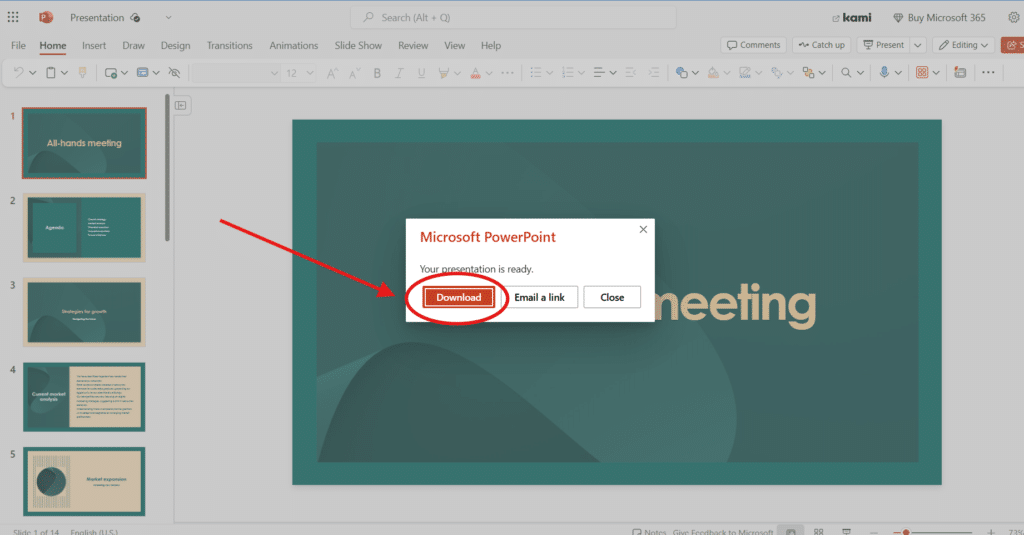
Select the Download option that appears on the far left. (Email a link will create a shareable link to the live presentation, not create a PDF.)
Go to your browser’s most recent downloads and open the file to review it!
PowerPoint Software
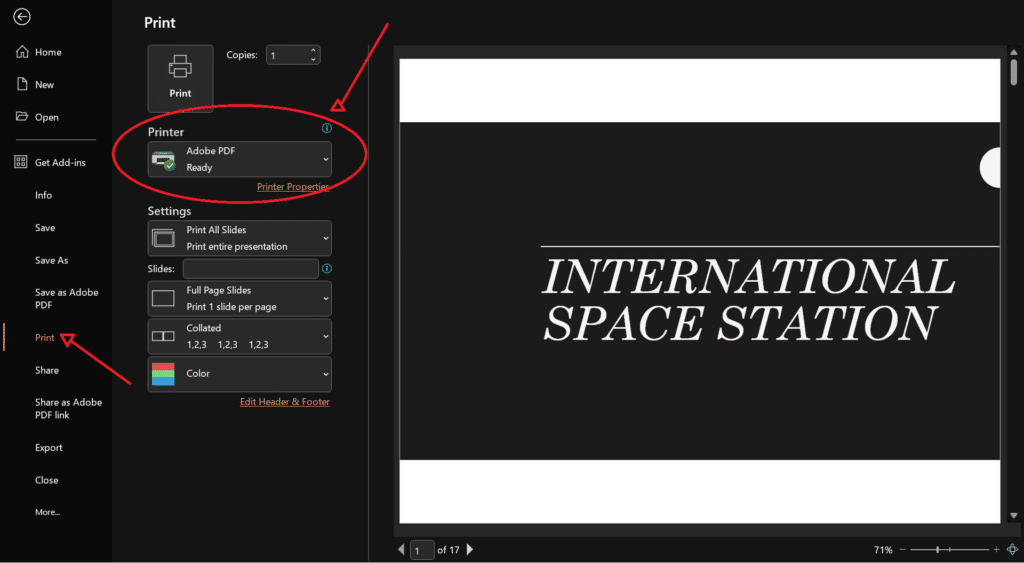
From the menu, select the Print option. Underneath any printer options you have there, there will also be the option at the bottom to Save as PDF. Now click Print and save the PDF in whatever location on your computer that you desire!
PowerPoint In-Browser
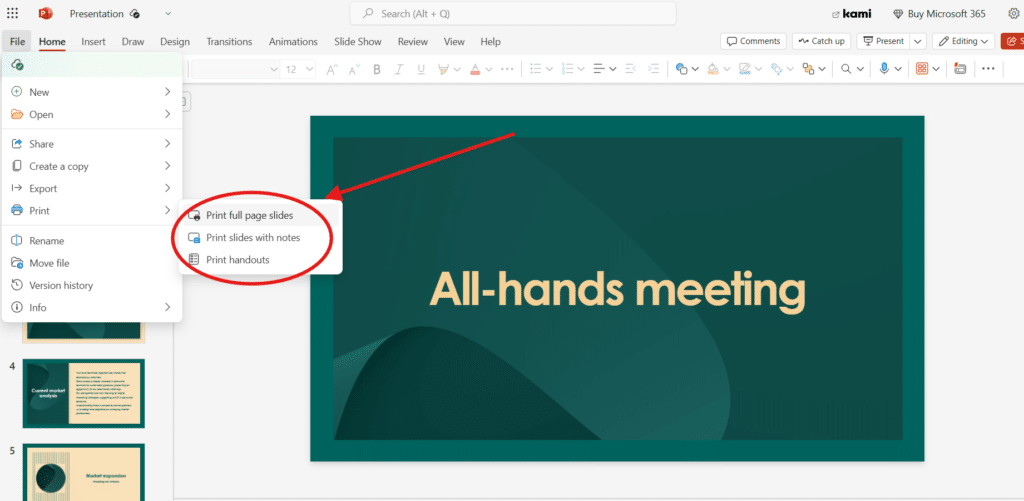
From the File menu, select the Print option and then choose whether you want to print full page slides, slides with notes or handouts.
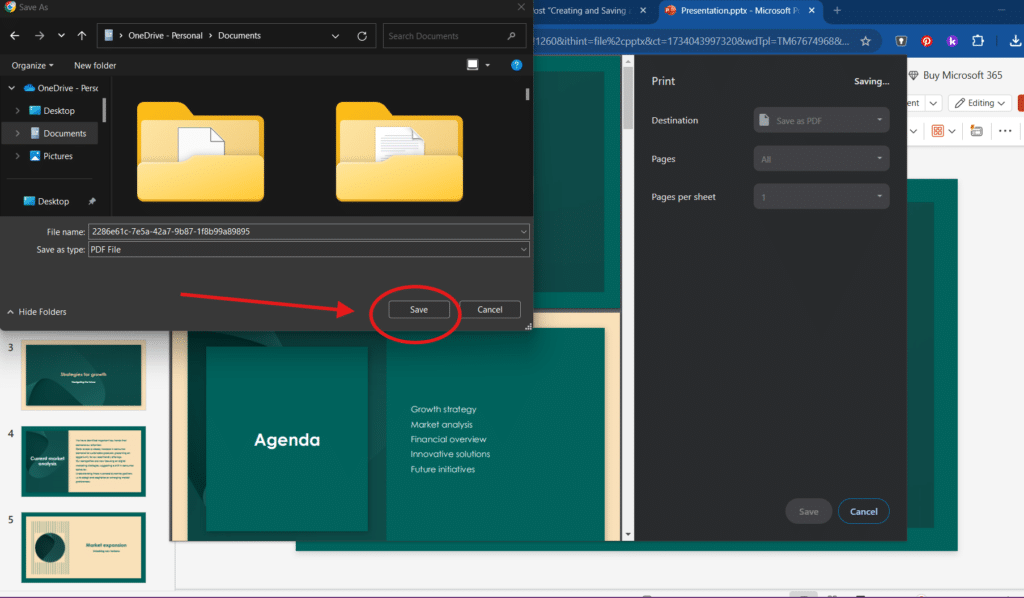
In the Print preview that opens, open the Destination menu. Underneath any printer options you have there, there will also be the option at the bottom to Save as PDF. Once, this is selected, instead of Print the word Save will appear in the bottom right. Click Save!
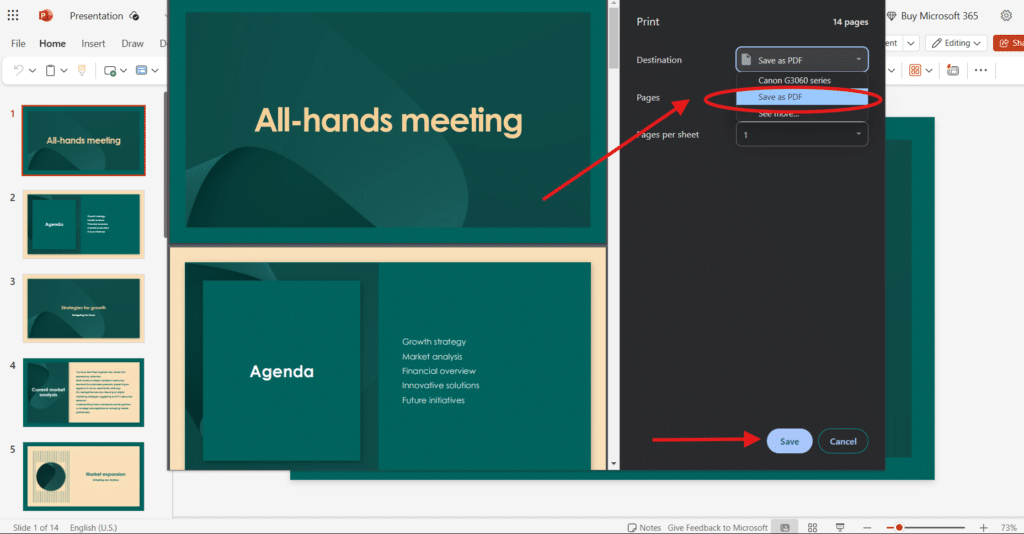
Now save the PDF in whatever location on your computer that you desire.
Why Save A Slideshow as a PDF?
Simply put, saving something as a PDF helps keep your presentation looking just the way you want it to.
When downloading editable files to different computers, you always run the risk of something being lost in the translation. Your fonts, layered images, text boxes and more are all vulnerable to being changed or moved if the technology receiving the file doesn’t match the technology used to create the file. For a lot of innovative educational presentations, those changes will compromise the full brilliance that the teacher creating it had planned.
Saving a Google Slides or PowerPoint presentation as a PDF freezes all these elements in their intended place. If you want your file to remain editable, there are several options for making that happen as well! You can make a PDF editable using Adobe Pro, use a browser extension like Kami, a free online editor like Canva and many other options.
Knowledge is power! Hopefully this knowledge has empowered you to move forward creating content for your classes with more confidence.
Effective Email Management for Teachers: Organizing, Filtering, and Staying On Top of Messages
Effective email management is crucial for teachers to stay organized, communicate effectively, and keep track…
How to Convert PowerPoint Presentations to Google Slides (and Why You Should)
Teachers often create resources in PowerPoint, but as more schools adopt Google Workspace, it’s becoming…
Basic Troubleshooting Tips for Common Technology Issues in the Classroom
With the integration of technology in the classroom comes a myriad of potential issues that…
Essential Keyboard Shortcuts Every New Teacher Should Know
Keyboard shortcuts are a great way to save time and effort, something every teacher desperately…
Creating and Saving a PDF from Google Slides or PowerPoint
Creating a Google Slides or PowerPoint presentation and saving it as a PDF is easier…


