Valuable Tips for Getting Started as a Technology Teacher You Need to Know
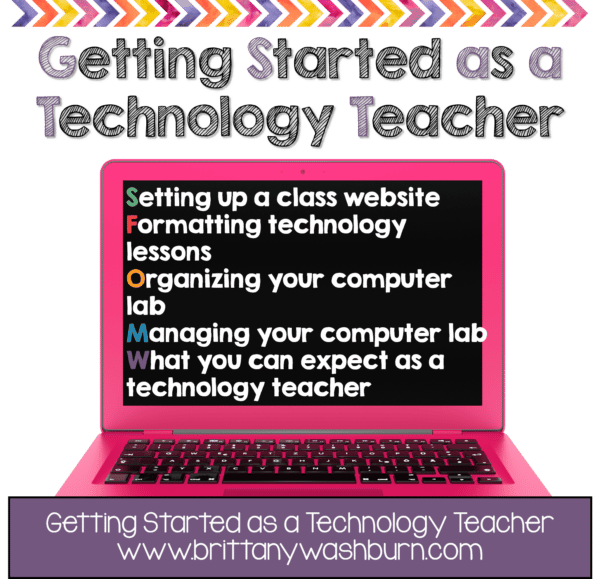
Getting started as a technology teacher can feel overwhelming. Are you a new technology teacher or just interested in learning how another technology teacher gets organized at the beginning of the school year? This post goes over everything you need to know to give your students a great start.
Would you like to try my K-5 Technology Curriculum for 30 days to see if it is a good fit for your students? Click here and use the code TRYK5TECH1 at checkout to get the first 30 days for just $1!
Setting up a class website
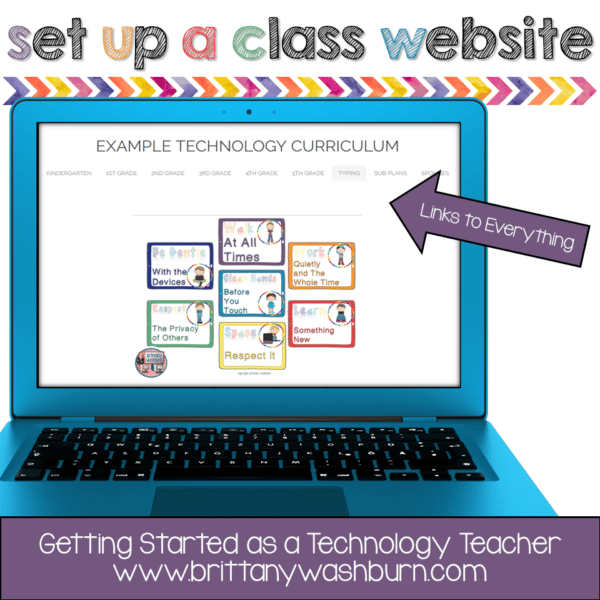
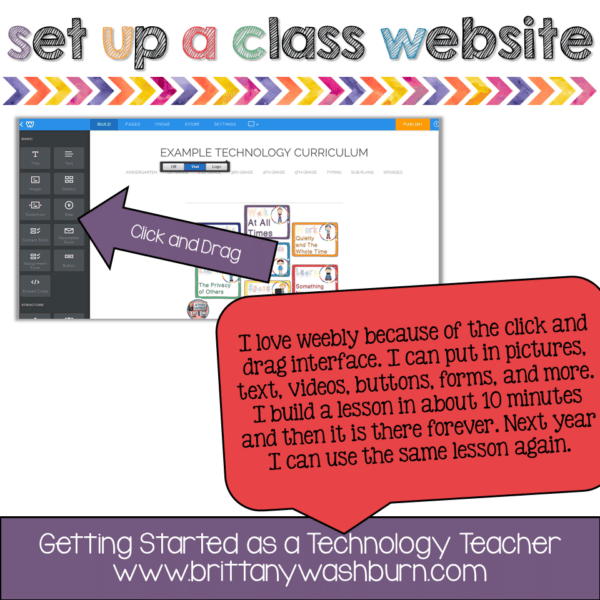
There are some great website building platforms out there and you can use any one you like. I build mine in Weebly because I like the ease of the click and drag interface. Each lesson I build has some basic components that are the same, so using the features in weebly I am able to copy a page and then just change out a few elements for each lesson.
Click here to see an example website I have set up.
Formatting technology lessons
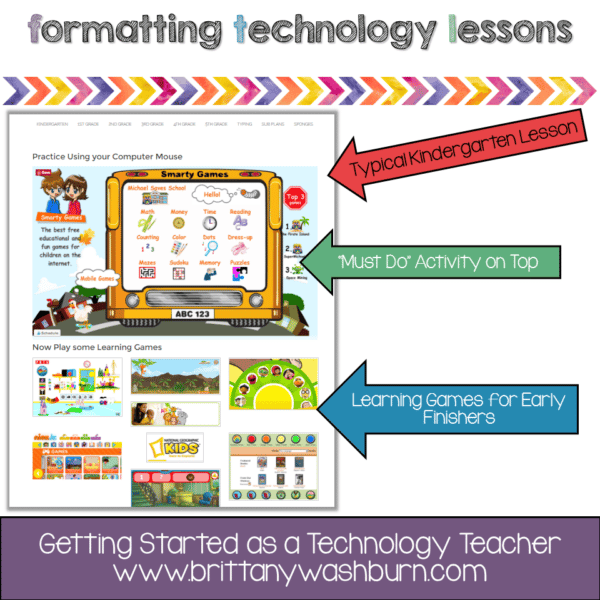 Kindergarten through second grade generally has a “must do” activity and then learning games for early finishers. When I first started teaching technology I got some push-back from the kindergarten team because they thought their students were just “playing” on the computers. I had to show them the standards and explain how important knowing how to use a computer mouse is to the ability to do more complicated lessons in the future. I take the whole first quarter to build this skill (along with logging in to their accounts and navigating to the class website). The websites I choose for mouse practice nearly always have an educational component to them that will help in the classroom. Whether it is number sense or letter sounds, my students are developing multiple skills at one time. I’m sharing this tidbit with you so that you can plan how to address the issue if it is brought up for you!
  3rd through 5th grade has three components to each lesson. I love to start with a warm up activity like keyboarding for the first 10 minutes of class. On my class website I set up a page with keyboarding practice options and taught my students to go directly there once they logged in. After keyboarding comes the directions and the bulk of the lesson. I love making screencasts of the directions so that students can watch as many times as they need to and refer back when necessary during their lesson. It means more prep time for me, but it makes class run so smoothly! So the lesson page includes the objectives, a video of directions, and the links to the lesson activities. At the bottom there are directions for what to do if they finish early and usually a link to direct them to the early finisher activities. See what I mean here.
 *These are affiliate links to Amazon. If you purchase one of these after clicking through from my blog I will receive compensation.
Always Have a Back Up Plan
level and put them to the side so you can grab and go when needed.
Would you like to try my K-5 Technology Curriculum for 30 days to see if it is a good fit for your students? Click here and use the code TRYK5TECH1 at checkout to get the first 30 days for just $1!
Teaching Strategies for Computer Lab Classes
As a new technology teacher managing 45-minute class sessions and teaching different grade levels every period, having an effective teaching strategy is crucial. One highly effective pedagogical approach is the “I Do, We Do, You Do” method. This structured approach helps students gradually become independent in their learning and skill application.
The “I Do, We Do, You Do” Approach
-
I Do (Modeling)
- Explanation: The teacher introduces the new skill or concept, demonstrating it step-by-step while explaining the process aloud. This stage involves direct instruction where students watch and listen.
- Primary Students: Use simple, clear language and visual aids. Demonstrate each step slowly and repeat as necessary. Use tools like large screens or projectors to ensure all students can see.
- Intermediate Students: You can use more technical language and go at a slightly faster pace. Encourage questions to ensure understanding.
-
We Do (Guided Practice)
- Explanation: The teacher and students work through the task together. This allows students to practice the new skill with the teacher’s guidance and immediate feedback.
- Primary Students: Perform the task together as a class. Use interactive tools like smartboards where students can take turns practicing parts of the task. Offer constant support and praise to build confidence.
- Intermediate Students: Pair students or create small groups to encourage collaboration. The teacher moves around the classroom, providing support and answering questions.
-
You Do (Independent Practice)
- Explanation: Students apply the new skill on their own. The teacher observes and provides assistance as needed.
- Primary Students: Provide simple, straightforward tasks that reinforce the new skill. Ensure tasks are manageable to avoid frustration. Offer positive reinforcement and be ready to step in with help.
- Intermediate Students: Assign more complex, open-ended tasks that require applying the new skill in different contexts. Encourage problem-solving and critical thinking. Use rubrics to give structured feedback.
Introducing and Practicing Skills by Grade Level
Primary Students (K-2)
- Introduction: Start with the basics. Use stories, songs, and games to introduce new skills. Make learning fun and engaging with colorful visuals and interactive elements.
- Practice: Keep tasks short and varied. Use repetition to reinforce skills. Provide hands-on activities where students can manipulate objects and see immediate results.
- Technology Integration: Incorporate simple, age-appropriate apps and tools. Focus on developing basic computer skills like using a mouse, typing, and understanding simple software.
Intermediate Students (3-5)
- Introduction: Use more detailed explanations and demonstrations. Connect new skills to prior knowledge and real-world applications to make learning relevant.
- Practice: Assign projects that require multiple steps and critical thinking. Encourage students to work in pairs or groups to solve problems collaboratively.
- Technology Integration: Introduce more sophisticated tools and software. Encourage students to explore and experiment with new technologies. Focus on building digital literacy and problem-solving skills.
Additional Tips for Building Teaching Confidence
-
Preparation is Key
- Plan your lessons thoroughly, anticipating possible questions and challenges. Have all materials and technology ready before class begins.
-
Classroom Management
- Establish clear rules and procedures for computer use. Use visual aids and consistent routines to help students know what to expect. Implement a system for students to signal when they need help without disrupting the class.
-
Interactive and Engaging Lessons
- Use a variety of teaching methods to keep students engaged. Incorporate multimedia, interactive games, and hands-on projects. Encourage student participation and feedback.
-
Continuous Learning
- Stay updated with the latest educational technology trends. Attend professional development workshops and collaborate with other tech teachers. Reflect on your teaching practices and be open to new strategies.
-
Build Relationships
- Get to know your students and create a supportive learning environment. Show enthusiasm for the subject and be patient as students learn new skills. Celebrate their successes, no matter how small.
By using the “I Do, We Do, You Do” approach and adapting your teaching strategies to the needs of different grade levels, you’ll create an effective and engaging learning environment. With preparation, continuous learning, and a focus on student engagement, you’ll build your teaching confidence and help your students succeed in the digital world.
Organizing your Computer Lab
 It wasn’t until about 6 months in that I was finally happy with the setup. I chose to completely deconstruct the first row of computers to make room for a projector cart and carpet space. Luckily the computers in the front row were those awesome all-in-one Lenovos. They didn’t need to be hardwired to the internet so I was able to move them to another part of the classroom. This made space for a desk for me, too! Well, a table not a desk, but at least I had a place to sit when I was planning.
  Since I never write much on the whiteboard, I decided to use this space for the I Can Statements. Yay for magnets because that is exactly what I used for this purpose! Each week I would choose the corresponding I Can Statements for each grade level K-5 and post them on the board. Occasionally if a group was off by a week I would have to change it out for them, but it was manageable because I had all of my I Can Statements in a binder, laminated and ready to go.
 Decorating Your Computer Lab
that you can save a bunch on getting your computer lab decorated.
Managing Your Computer Lab Classroom
What you can expect as a technology teacher
Would you like to try my K-5 Technology Curriculum for 30 days to see if it is a good fit for your students? Click here and use the code TRYK5TECH1 at checkout to get the first 30 days for just $1!
Want to deep dive into this topic with even more information? Get a 29 page PDF guide delivered to your inbox!


