Green Screen Tools and Tips for Using in the Classroom

Green Screen Tools and Tips for Using in the Classroom


A green background works well because it is the furthest color away from human skin tones. That makes it easier to remove the green and place a background. If you aren’t familiar with green screen creation, follow the tips below to get started:
1. Pick your app.
Whether you are on iOS or Android, it is quite easy to create the special effects green screens afford. Some apps you can use include Green Screen for iOS or Green Screen Pro for Android. For Windows or Mac users, do NOT spend hundreds of dollars on a green screen program.
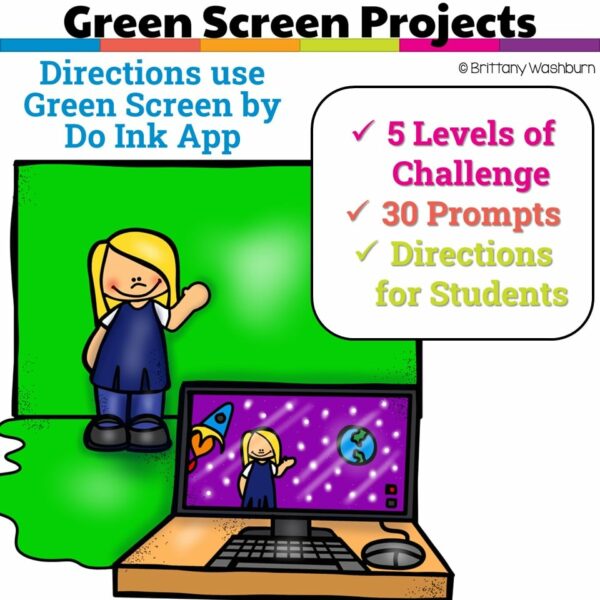
Do Ink is a green screen app available in iPhone, iTunes, and iPad. By using the green screen effect, Do Ink green screen lets teachers and kids create amazing photo and video projects. Elementary school kids can use Do Ink green screen to create their own movies, tell stories, explain their ideas, and so on. This app can use the live camera feature but it also allows you to work on prerecorded photos and videos. Creations of kids can be saved so that it can be shared later. Other features include using both the front and back cameras, setting a stop time for the video, white balance, exposure, video trimming, etc.
2. Decide on the type of project.
Consider allowing your students to choose. For example, you might assign them a book trailer, a holiday portrait, or thank you note to a guest speaker, a commercial for a product, news/morning broadcast, or historical report. They might even decide to do something else like a sports or music video.
3. Keep the following technical tips in mind:

- Avoid shadows.
- Use tripods.
- Place your subject 6-10 feet in front of the green background to avoid “green light spill” onto your subject.
- Make sure no one wears clothing that is green, brown or a combination of those two colors.
- Light the green background separately from your subject(s).
- Create a green background using one of these (in order of preference):
- Vinyl – an inexpensive shower curtain may work (like the one from Dollar Tree above)
- Muslin and other cloth
- Green paper (matte or glossy, although the former is preferred)

Take advantage of a teleprompter (like the free online CuePrompter on a computer) to help cue students.
How Do Ink Green Screen Works
Do Ink green screen is a versatile and easy to use tool. Here is how you can create photos and videos by using Do Ink:
- Open the Do Ink green screen app.
- You will see a “+” sign. Click on this sign.
- Click on “create a new project”.
- Now, the first thing to do is to add the bottom layer. To do this, select the source from where you want to import the picture. The source may be your camera, video, image or Do Ink library.
- Using the masking feature will allow you to create different transparent sections on the layers. Therefore, it is recommended to use this feature.
- Add the middle layer i.e. camera layer on the timeline. Again, select the source which may be a camera, video, image or Do Ink library. If you want to take a picture or record a video, use the camera as a source.
- If you want to add some additional backgrounds, then drag the picture to a stopping point (that you consider appropriate). This will increase the number of seconds. Then click on the “+” sign to add an additional background.
- If you want to zoom in a layer, pinch it in the preview window.
- If you want to take a picture, click on the white, circle-shaped icon. You will have the option to discard your creation or save it to the camera roll.
- If you want to take a video, click on the red, circle shaped icon.
Using Do Ink Green Screen with elementary students
Do Ink green screen is one of the best tools for education. If you want to use it with your elementary students, here is how you can do it:
Presentations about Animals
Students can use Do Ink green screen to present their learnings about different animals they studied in the library.
- To make this project fun and interesting, ask your students to eat large pizzas and bring the empty pizza boxes to the school.
- The next step is to prepare the green screen. To do this, paste green paper to the inside of the boxes.
- Ask students to draw the animals they researched on a paper and cut out this paper.
- Paste green paper on rulers/sticks.
- Tape the animals on green rulers.
- Point the camera at the pizza box and hold the animals in front of it.
- Start recording.
- The green background will be replaced with the photo you have selected. For this purpose, animal habitat pictures can be used.
- Upload the student creations to the Google drive.
- Once all students are done with their projects, share these videos with the whole class for viewing.
Educational Benefits of doing Green Screen Projects
Green screen allows pupils to discuss, evaluate or reflect on their learning using their imagination and digital skills. Pupils can share a story or get into character using a background setting of their choice – this is a classic example of using technology to do things that would not be possible without technology as suggested with the SAMR model in the classroom.
In conclusion, this technology which was once an awe-inspiring feat only attainable if you were working in the film industry on the backlots of Universal Studios is now readily available and easy and engaging for your classroom. Whether you teach preschool ages students or Year 12 students, green screen technology has a place embedded into your learning and teaching program. If you already have iPads in your school, then you are well on your way to integrating green screen technology.

Introduction to Green Screen Technology in the Classroom
Green screen technology is a fun and interactive way for students to unleash their creativity and engage with digital media. It involves filming or photographing subjects in front of a green backdrop and then replacing the green screen with a different background or scene using editing software. This technology has become increasingly popular in the classroom as it provides students with a unique and exciting way to demonstrate their learning while also developing their visual and digital literacy skills.
What is Green Screen Technology?
Green screen technology, also known as chroma keying, is a special effects technique used in film, television, and photography. It involves filming or photographing subjects against a green or blue backdrop and then replacing the colored background with another image or video using editing software. This technique allows filmmakers, photographers, and now educators to create unique and realistic visual effects that would be difficult or impossible to achieve in real-life settings.
Benefits of Using Green Screen Technology in the Classroom
Green screen technology offers numerous benefits for educators and students alike. It promotes creativity, enhances critical thinking, and fosters digital literacy skills. Additionally, it allows students to collaborate and work together on projects, provides a fun and interactive learning experience, and allows for a more engaging and dynamic way to present information. It can also increase student engagement and retention, as students are more likely to remember information when it is presented in an exciting and memorable way.
Choosing the Perfect Green Screen Materials for Elementary Students
Choosing the right green screen material is an important consideration for any classroom project. There are various options available, each with its own advantages and disadvantages. Here are some things to consider when choosing the perfect green screen material for your elementary students.
Types of Green Screen Materials Available
There are two main types of green screen materials: fabric and paper. Fabric is more durable and can be reused multiple times, while paper is more affordable and disposable. There are also different shades of green available, and it is important to choose a shade that is bright and vibrant to avoid any shadow or color issues in your final product.
Considerations for Selecting the Right Green Screen Material
When selecting a green screen material, consider the age and skill level of your students, the frequency of use, and the budget available. For younger students or those new to green screen technology, paper may be a better option as it is more affordable and can be easily replaced if damaged. For more experienced or advanced students, fabric may be a better choice as it is more durable and can be reused multiple times. It is also important to consider the size of your green screen, as well as the lighting and positioning of your subject.
Setting Up and Positioning the Green Screen in the Classroom
Setting up and positioning the green screen is a critical step in achieving quality results from your green screen projects. Here are some tips on choosing the best location and setting up your green screen frame and stand for optimal results.
Choosing the Best Location for the Green Screen
When choosing a location for your green screen, consider the available space, lighting conditions, and potential background noise or distractions. Ideally, the green screen should be placed in a well-lit area with minimal background noise or distractions. It should also be positioned away from any walls or obstacles to avoid casting shadows or interfering with lighting.
Setting Up the Green Screen Frame and Stand
To set up the green screen frame and stand, start by assembling the frame according to the manufacturer’s instructions. Once assembled, attach the green screen material to the frame using clips or velcro. Be sure to stretch the material tightly to avoid any wrinkles or folds. Finally, position the stand and frame in the desired location and adjust the height and angle as needed to achieve the best results.
Lighting Techniques for Optimal Green Screen Results
Lighting is a critical component in achieving high-quality green screen results. Proper lighting helps to eliminate shadows, prevent color spillage, and create a seamless and realistic final product. Here are some tips on achieving optimal lighting for your classroom green screen projects.
Why Lighting is Important for Green Screen Projects
Proper lighting is essential for achieving high-quality green screen results. Without proper lighting, shadows and color spillage can occur, resulting in a less realistic and seamless final product. Lighting also helps to create the illusion of depth and dimension, making the final product look more natural and realistic.
Best Lighting Setups for Classroom Green Screen Projects
To achieve optimal lighting for your green screen projects, use three-point lighting techniques. This involves using three lights: a key light, a fill light, and a backlight. The key light is the primary light source and should be positioned in front of the subject, while the fill light is positioned opposite the key light to fill in any shadows. The backlight is positioned behind the subject to create a sense of depth and dimension. It is also important to avoid any reflective surfaces that may interfere with lighting, such as windows or shiny objects.
Easy-to-Use Green Screen Software and Tools for Elementary Students
Green screen technology, also known as chroma keying, allows users to superimpose or replace the backgrounds of videos or images. This technology has revolutionized the way we watch movies, sports events, and even the news. However, it also has great potential in the classroom, particularly for elementary students who learn best through interactive and engaging experiences.
There are several easy-to-use green screen software and tools that are perfect for elementary students. Some of the most popular ones include:
- iMovie: This video editing software is available on Mac computers and iOS devices. It has a built-in green screen effect that allows users to replace the background of videos or images easily.
- Do Ink: This green screen app is available for iPad and iPhone users. It features intuitive tools that allow students to create their own videos easily.
- WeVideo: This cloud-based video editing tool is perfect for students who want to collaborate on green screen projects. It allows users to access their projects from anywhere with an internet connection.
Overview of Popular Green Screen Software and Tools
To decide which software or tool is best for your classroom, it is important to understand the features and benefits of each option. iMovie, for instance, is a great choice for Mac users who want a comprehensive video editing software that includes a green screen effect. Do Ink offers an affordable and easy-to-use app for iPad and iPhone users, while WeVideo offers cloud-based editing and collaboration tools for students who want to work together on projects.
How to Use Green Screen Software for Elementary Students
Using green screen software may seem daunting, but with a few simple steps, even elementary students can master it. The first step is to choose a background that fits the theme of your video or image. Next, set up the green screen by hanging a green fabric or paper behind the subject. Make sure the green screen is smooth and evenly lit.
Then, record the video or take a photo against the green screen. Finally, use the green screen software to replace the green background with the chosen background image or video. With practice, students can create impressive green screen projects that showcase their creativity and knowledge.
Creative Ideas for Utilizing Green Screen Technology in the Classroom
Green screen technology offers endless possibilities for classroom projects that can engage and excite elementary students. Here are some creative ideas to get you started:
Teaching with Green Screen: Making Learning Fun and Engaging
Green screen technology can help make learning more interactive and exciting for elementary students. For example, you can create virtual field trips that take students to historical or scientific locations that are otherwise difficult or impossible to visit. This can enhance their understanding of the subject matter and make learning more fun.
Creative Projects Using Green Screen Technology in the Classroom
Green screen technology also allows students to unleash their creativity and produce unique projects. For example, students can create their own weather reports, news segments, or movie trailers using green screen technology. They can also act out historical events or create their own stories in different settings. The possibilities are endless.
Engaging Elementary Students with Green Screen Projects
To engage elementary students with green screen projects, it is important to create a collaborative and supportive classroom environment. Here are some tips to help you get started:
Collaborative Learning with Green Screen Projects
Green screen projects lend themselves well to collaborative learning since they allow students to work together on a common goal. Assign students to groups and encourage them to brainstorm and collaborate on their green screen projects. This can help them develop teamwork and communication skills in addition to improving their creativity and technical skills.
Engaging Younger Students through Fun and Creative Projects
Younger students may find green screen technology intimidating at first. To engage them, try to create fun and imaginative projects that reflect their interests. For example, have them create their own superhero or space adventure story using green screen technology. This can help them develop their creativity and imagination while learning technical skills.
Troubleshooting Common Green Screen Issues in the Classroom
Despite the potential benefits of green screen technology, it can sometimes present technical challenges. Here are some common issues and how to overcome them:
Common Problems with Green Screen Technology and How to Overcome Them
- Uneven lighting can cause shadows and make it difficult to remove the green screen background. Solution: Make sure the lighting is even and bright.
- Poor quality green screen fabric or paper can cause wrinkles or creases that distort the background. Solution: Use high-quality green screen fabric or paper, and make sure it is smooth and free of wrinkles.
Ways to Prevent Technical Issues during Green Screen Projects
- Make sure you have enough storage space for your videos and images.
- Use high-quality audio equipment to ensure clear sound.
- Test your green screen setup and software before starting any projects to identify potential issues.
By being aware of these common issues and taking steps to prevent and overcome them, you can ensure a smooth and successful green screen project experience for you and your students.Incorporating Green Screen Technology in the classroom can be a fun and creative way to engage elementary students and enhance their learning experience. By following these tips and tricks, you can ensure that your students are set up for success with their Green Screen projects. Remember to have fun and encourage your students to let their imaginations run wild. Harnessing the power of technology in the classroom has never been more exciting!
Frequently Asked Questions (FAQ)
What kind of materials do I need for a Green Screen project?
To create a Green Screen project, you’ll need a Green Screen background, which can come in the form of a fabric or paper backdrop, or a paint-on solution. It’s important to choose a material that is suitable for your classroom setup and the age of your students.
Can Green Screen Technology be used with younger elementary students?
Absolutely! Green Screen Technology can be used with students of all ages. Some software and tools are designed specifically for younger elementary students, and many projects can be adjusted to suit different age groups.
What kind of projects can be created with Green Screen Technology?
Green Screen Technology is incredibly versatile and can be used to create a wide range of projects. Some popular ideas include creating news reports, acting out historical events, and exploring different parts of the world. The possibilities are endless!
Do I need to be a technology expert to use Green Screen Technology in the classroom?
Not at all! While some technical know-how is helpful, many Green Screen software and tools are designed to be user-friendly and easy to navigate. Start with simple projects and gradually work your way up to more complex ones.