PicCollage

PicCollage is an editing app that can be used to edit photos, making photo collages and free cards. PicCollage comes with hundreds of different types of stickers, photo grid sizes, and layouts. Apart from this, it also includes many cute textures and background patterns that can make photo editing a fun and interesting task. It also allows you to draw on the photo collages by using Doodle. You can use photos from different sources such as your camera gallery, Instagram or Facebook. You can easily decorate your photos and cut them out just by using your finger. This app is perfect for creating stories for Snapchat and Instagram because it comes with a full-screen canvas size.

Here is how PicCollage works:
- Download PicCollage and install it.

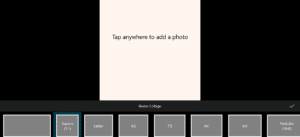
2. Run the app and choose the layout according to your choice from a list of seven different layouts.
3. The next step is to add photos to your collage. In this step, you’ll see a list on the left side. Add photos to this list. Pick these photos by using your finger and drop them on the photo frame. You can also click on the “fill at random” button and your photos will be added to the frame automatically.
4. Customize the photos as you want. You can add, remove, rotate, zoom in, zoom out, and drag photos. You can also fill the background of your collage, add text to your photos, adjust the space, margin, border, corner and photo number of your collage. If you want to apply shadow, you can also do it here.
5. The last step is to export your photos. First, choose the size of the page and then save it as an image format that you want. You can save it as PEG, TIFF or PNG.
Alignment with the iTECH Model
1. Inspire: Introduce PicCollage by showcasing examples of vibrant photo collages, digital stories, or creative avatars. Stimulate interest by discussing how digital art can be a form of personal expression and storytelling.
2. Try: Let students explore the app by creating simple collages or designs and experimenting with different layouts, stickers, and backgrounds. Encourage them to use the Doodle feature for custom drawings and to import photos from various sources.
3. Expand: Introduce more structured projects, such as creating digital avatars or visual representations of a story, poem, or historical event. Teach students about design principles like balance, contrast, and harmony as they work on their collages.
4. Create: Assign a creative project where students utilize PicCollage to its fullest. For example, designing avatars that reflect their personalities or creating a digital collage that represents a key concept from a lesson. Encourage originality and individual expression in their projects.
5. Huddle: Host a gallery walk or a digital showcase where students present their PicCollage creations. Facilitate a discussion on the creative process, design choices, and what they learned through this activity.

PicCollage is one of the best tools that you can use with your elementary students to do interesting and fun projects. Here is an idea of using PicCollage with your students:
Creating Student Avatars
Students can create their avatars and use it as their login to different websites. Here is how it can be done:
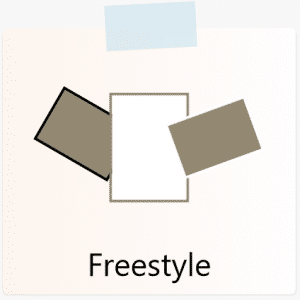
- Use the freestyle template and square image size for this project. This is because a square image can be uploaded to most of the account profiles.
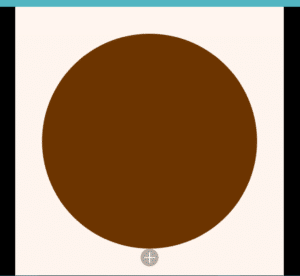
- In the web search bar, type “brown circle” and press enter. Brown circles of various tones will appear in the search. This brown circle will be used as a head so, students can select any colored circle that they want for their avatar.
3. Type “patterned fabric” in the search bar. A number of patterns will appear. Students can select any pattern that they want. This pattern will be used as shoulders of the avatar. Touch the pattern for two times and then press the “clip” button.
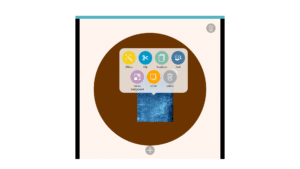
4. Pick the oval shape and by using this shape, make a semi-circle on the pattern. Click on the check and this semi-circle will be inserted into the photo canvas.
5. Type “cartoon eyes PNG” in the search bar and a number of cartoon eyes will appear. Again, by using the above process, insert these cartoon eyes into the canvas.

Students can also search for other accessories like jewelry, hair, and headphones to design their avatar. Instead of searching accessories, students can also use the doodle tool to draw different accessories. Let your students be creative!

2. Visual Summaries: Have students create a collage summarizing a book they’ve read, a historical event, or a scientific concept, combining images, text, and their own artwork.
Tips for Effective Implementation
1. Familiarize with the Tool: Begin with a tutorial session on using PicCollage, covering its basic features and functionalities.
2. Encourage Exploration: Allow students to experiment and explore their artistic side, providing guidance but also giving them creative freedom.
3. Focus on Digital Storytelling: Integrate digital storytelling elements into projects, encouraging students to convey narratives or concepts through their collages.
Role of Educators
Educators can guide students in harnessing PicCollage as a tool for creative expression and digital literacy. While overseeing projects, focus on helping students develop a narrative, theme, or message in their work, and ensure they understand basic design principles.
PicCollage offers a fun and engaging way for students to delve into digital art and design. By integrating this tool with the iTECH Model, educators can effectively foster creativity, visual communication skills, and digital literacy. Whether creating avatars, storyboards, or thematic collages, PicCollage can be a valuable addition to the digital learning toolkit.
Click here for a presentation you can use with your staff. It is completely editable so feel free to make any changes you need.