Thinglink

Thinglink is an interactive and user-friendly digital tool which allows you to turn any image into an interactive graphic. Thinglink is a very famous digital tool in many schools and is trusted by over 5 million online content creators. It can easily collaborate with any image, text, audio or a video.

Here is how Thinglink works:
- Download the application on your smart device.
- Once you have downloaded the application open it up.


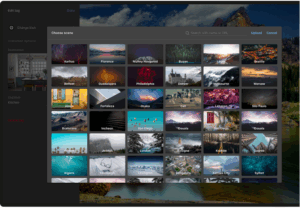
3. You will have to add an image from your photo library into the application.
4. When you have added the photo, the application allows you to edit it. You can add up different points in the photo.
5. The editing options or the points then allows you to include text or media.

6. The text can be a simple text, a description, a summary of that particular thing, a memory or a URL. Whereas, the media option allows you to add a picture from your gallery or add a video in it. You can also take a photo or a video from the application itself.

7. The application further allows you to add a video from YouTube at the points you have added.
Alignment with the iTECH Model
- Inspire: Demonstrate the capabilities of Thinglink by showcasing interactive images that have been enhanced with multimedia elements. Discuss how Thinglink can turn a standard lesson into an engaging, interactive experience.
- Try: Introduce students to Thinglink with a simple activity, like adding annotations to an image related to a current topic of study. Guide them through the process of inserting points and adding descriptions or multimedia content.
- Expand: Encourage students to explore more complex applications of Thinglink, such as creating an interactive human body diagram or a flag quiz. Teach them advanced features like embedding videos and creating linked content within images.
- Create: Assign a project where students use Thinglink to create an interactive visual aid or presentation. For example, they could make an annotated map of historical events or a scientific diagram with embedded explanations. You can foster creativity and critical thinking as they decide how to best convey information through interactive elements.
- Huddle: Organize a session where students present their Thinglink projects to the class. Facilitate a discussion about the learning experience and the information conveyed through their interactive images.

Thinglink can be used with the kids in multiple interactive ways:
Human Body Parts Lesson
Use this application with the kids for making them understand the parts of the human body. You can add an image of a human body and add points on the different parts of the body. Ask the kids about the parts by highlighting them. Add the descriptions in the points and when the kid answers the question explain him the description that you wrote in the points.
Flags Activity
You can also make your students memorize the flags of different countries. Simply make a chart and add as many flags of the countries as you want. Place the points on the different maps and add the descriptions in the pointers. When you interact with the kids firstly show them the flag and ask them about the country. If the kids fail to answer simply show the kids those descriptions which you wrote.
Activities related to pointers
You can assign the children different activities regarding the pointers. Teach the children how to insert a point along with the description. Now, give them different tasks to be done, for instance, ask them to make a quiz for the other student. By this way, the children will have an interactive session as well and they will enjoy while learning the new things. Try to add more and more group activities when you use this application. Although it will give positive result individually, while interacting with groups the results can be enhanced as it will be a fast technique to learn new things.
Tips for Effective Implementation
- Encourage Exploration: Motivate students to explore the full range of Thinglink’s features, and to experiment with different types of embedded content.
- Collaborative Learning: Promote group activities using Thinglink to encourage teamwork and peer learning.
- Real-World Connections: Relate Thinglink activities to real-world scenarios, making the content more relevant and engaging.
Role of Educators
Educators can guide students in using Thinglink effectively, demonstrating how to create interactive images and encouraging exploration of its features. Support students in conceptualizing and executing their projects. Provide feedback to enhance their learning experience.
Thinglink offers an innovative approach to learning, turning static images into dynamic educational tools. By integrating Thinglink with the iTECH Model, educators can foster an interactive, engaging, and visually stimulating learning environment. This tool enhances students’ understanding of various concepts and cultivates their digital literacy and creative skills, making learning a more interactive and enjoyable experience.
Click here for a presentation you can use with your staff. It is completely editable so feel free to make any changes you need.